































Studying abroad is a life-changing opportunity — world-class education, real global exposure, and stronger career prospects. Before you can travel to your dream study destination, though, you need a student visa, and this step trips up more applicants than any other part of the process.
At Every Moment Travels, we walk students through this constantly: paperwork, financial proof, interviews, and strict country-specific requirements. A single mistake anywhere in the chain can delay your application or sink it outright.
This guide walks through the full process, the documents you’ll need, realistic timelines, and the tips that actually move the needle on approval. Whether you’re headed to the USA, UK, Canada, Australia, or Europe, the core process stays remarkably similar.
What Is a Student Visa?
A student visa is an official document that a country’s immigration authority issues, allowing international students to live and study legally for a defined period. It grants legal permission to study abroad, stays valid for your course duration, sometimes allows part-time work, requires proof of both finances and admission, and is often renewable.
Each country names its own version: the USA calls it the F-1 Visa, the UK the Student Route Visa, Canada the Study Permit, Australia the Subclass 500, and Germany the National Student Visa.
For a broader look at visa processes generally, our step-by-step Schengen visa application guide covers a comparable process in more detail.
Why Student Visa Applications Get Rejected
Understanding the common failure points helps you avoid repeating them. The reasons we see most often: insufficient proof of funds, incomplete documentation, a weak statement of purpose, an unexplained academic gap, poor interview performance, incorrect information, and thin ties to your home country.
A structured, methodical application process addresses nearly all of these at once.
The Complete Application Process

Here’s the process most countries follow, step by step.
Step 1: Secure Admission From a Recognized Institution
You need admission from an approved university before you can even apply for a visa. That means an offer or acceptance letter, an admission confirmation number, tuition fee details, and your course duration in writing. Most embassies won’t touch a visa application without confirmed admission in hand.
Apply six to twelve months ahead where possible, verify your university’s accreditation before committing, and keep every admission document safe and easily accessible.
Step 2: Understand Your Destination’s Specific Requirements
Every country runs its own visa rules. Research the required documents, financial thresholds, processing time, application fees, work rights, and health insurance requirements for your specific destination, and confirm everything directly on the official embassy website rather than relying on forum advice.
For help choosing where to study in the first place, our guide to choosing the best study abroad program is worth reading first.
Step 3: Prepare Your Required Documents
Documentation carries more weight than any other part of your application. You’ll typically need a valid passport with at least six months’ validity and blank visa pages, your university acceptance letter, academic certificates and transcripts, language test scores (IELTS, TOEFL, or similar), proof of funds covering tuition, accommodation, living expenses, and travel, a statement of purpose explaining your course choice and career goals, passport photographs meeting embassy specifications, a medical examination where required, and a police clearance certificate for some countries.
Organize everything clearly before you submit — a disorganized file invites delay even when nothing is technically missing.
Step 4: Meet Your Proof of Funds Requirement
This ranks among the most heavily scrutinized parts of any student visa application. You need to demonstrate real financial capacity to cover tuition, living expenses, accommodation, and return travel.
Acceptable proof generally includes bank statements, education loan approval, scholarship letters, sponsor financial documents, and fixed deposits. Where possible, show more than the stated minimum — a comfortable margin above the threshold genuinely strengthens your case.
Our full guide to proof of funds requirements covers this in more depth.
Step 5: Pay the Visa Application Fee
Fees vary meaningfully by country. Roughly: USA from $160, UK from £363, Canada around CAD $150, and Australia from AUD $710. Keep every payment receipt as proof — you’ll likely need it later in the process.
Step 6: Complete Your Online Application
Most countries process applications online now. Use accurate information throughout, match your passport details exactly, avoid spelling errors, and double-check everything before you submit. Incorrect information, even something minor, can trigger a rejection.
Step 7: Book Your Biometrics Appointment
Biometric data — fingerprints, a digital photo, and a signature — helps verify your identity and prevents fraud. Book this as soon as your application allows.
Step 8: Attend Your Visa Interview (If Required)
Countries like the USA and UK often require an interview. Expect questions like why you chose this country, why this specific course, who’s funding your studies, and what your future plans look like.
Stay confident, give honest answers, explain your reasoning clearly, and dress professionally.
Step 9: Track Your Application
Once submitted, most systems let you track your visa status online. Processing generally runs 2–12 weeks depending on the country, so apply early to build in a real buffer.
Step 10: Receive Your Decision
Approval brings your visa stamp, an approval letter, and entry instructions. If you’re rejected, review the stated reasons carefully before you reapply — a resubmission without real changes rarely produces a different outcome.
A Recommended Application Timeline
12 months before travel: choose your course and country, and begin researching universities.
8–10 months before: apply to universities and start preparing your documents.
6 months before: receive admission and begin your visa application.
3 months before: submit your application and attend your interview.
1 month before: receive your visa decision and prepare for travel.
Requirements by Popular Destination

USA: an I-20 form from your university, SEVIS fee payment, the DS-160 application, and a visa interview.
UK: a Confirmation of Acceptance for Studies (CAS), proof of English proficiency, and financial evidence.
Canada: a letter of acceptance, proof of funds, a medical exam, and a statement of purpose.
Australia: a Confirmation of Enrolment (CoE), Overseas Student Health Cover, and meeting the Genuine Temporary Entrant requirement.
For destination comparisons more broadly, our guide to the cheapest countries to study abroad is a useful next read.
Writing a Strong Statement of Purpose
A strong SOP covers your academic background, your career goals, why you chose this specific country and university, and your plans after graduation. Avoid copy-pasted content, vague goals, and any information that contradicts the rest of your application — inconsistency is one of the fastest ways to raise doubt.
Preparing for Your Visa Interview
Practice the common questions ahead of time, carry your original documents, stay calm under pressure, and answer honestly. Avoid memorized, scripted-sounding answers, never provide false information, and don’t let uncertainty creep into your tone — officers notice hesitation on core facts like funding and study plans.
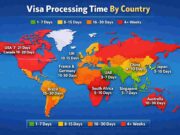
Processing Time by Country
| Country | Average Processing Time |
|---|---|
| USA | 3–8 weeks |
| UK | 3 weeks |
| Canada | 4–12 weeks |
| Australia | 4–8 weeks |
| Germany | 6–12 weeks |
Apply early regardless of your destination — these ranges shift with embassy workload and season.
What a Student Visa Application Actually Costs
Budget for more than just the visa fee itself: medical tests, English proficiency tests, document translation, travel to the embassy or visa center, and health insurance all add up alongside the base application fee.
What Improves Your Approval Odds
Apply early, submit complete documentation, show strong financial proof, write a genuinely convincing statement of purpose, demonstrate real study intent, and keep your information consistent across every document.
Avoid these mistakes specifically: submitting fake documents, showing insufficient funds, giving a weak explanation for any academic gap, missing deadlines, submitting incorrect application details, and walking into an interview unprepared. Avoiding these consistently improves your odds more than any single “hack” would.
Can You Work on a Student Visa?
Many countries allow part-time work for international students — typically around 20 hours per week during term time, with full-time hours permitted during scheduled breaks. Always confirm the specific limit for your destination before you commit to a work schedule.
Can a Student Visa Lead to Permanent Residency?
Some countries — Canada, Australia, the UK, and Germany among them — offer real pathways from a student visa toward permanent residency. These generally require a period of post-study work experience first, so it’s worth researching the specific pathway before you choose where to study if long-term settlement is part of your plan.
Final Thoughts
The student visa application process looks complex from the outside, but a structured approach makes it genuinely manageable. Secure your admission, prepare strong documentation, demonstrate real financial capacity, and present a clear, honest study plan — together, these significantly raise your approval odds.
Start early, stay organized, and treat this guide as your working checklist. Your study-abroad journey starts with getting the visa strategy right.
If you’d like direct help with your student visa application, reach out to us at everymomenttravels@gmail.com.








Thanks for finally talking about > Complete Steps To
Student Visa Application Guide – Every Moment Travels < Loved it!
Thank you so much for this positive feedback.